After the release of the new block editor in WordPress(Gutenberg ), the content editing process has completely changed. Gutenberg is a completely visual way of producing content. It makes the content creation process a lot easier.
This post discusses the way to add and different options to align images in WordPress block editor to create engaging content layouts.
Uploading an image in the post
The first step is to upload an image. You can do that from the computer, or insert an image using the image URL, or choose an image from the media library.
1- Alignment of single image

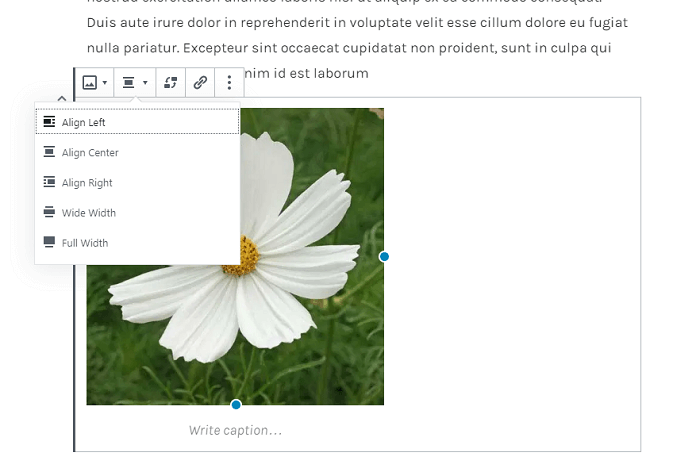
To edit and align images in WordPress block editor after inserting, click the image. Some icons will appear at the top of the image giving one the following options:
Alignment – Center
To align the image in the center, click the center alignment option. The text blocks nearby will be shifted above or below the picture.
Alignment – None
When you upload an image, it will have no alignment set up by default. If you have already selected some other alignment option, you can choose the alignment-none option again, and it will go back to no alignment. The text blocks will get positioned to the right of the screen.
Left / Right Alignment
To align the image left or right, click the left/right alignment option. The text blocks will automatically get positioned to the opposite side of the image.
Edit Image
One can use this option to get into the Edit Media screen and make edits like scaling, cropping, and resizing.
Remove Image
It 'doesn't remove it from the Media Library, but deletes it from the post.
New alignment options
In addition to the usual left, right, and center alignment options, Gutenberg offers the possibility of 2 more options to align images in WordPress block editor. These options provide an excellent way to break out of the confinements of the content area.
Wide-width option: The Wide-width takes up almost the whole width of the screen, and it has margins.
Full-width option: Full-width images cover the whole width of the content space and have no margins. It would help if you considered using them without a sidebar.
Keep in mind that these options have to be enabled and supported by the theme you are using.
2- Alignment of Multiple Images
Multiple images in one row Gutenberg no longer offers the option where one can select multiple images and insert them all at once. However, there are other methods to add multiple images in a row.
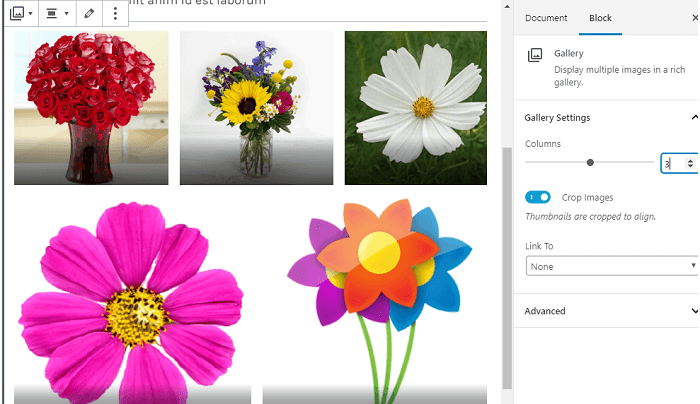
The Gallery block: To add images to the gallery block, click on the images you wish to add. Once all of your photos are selected, click on 'create gallery' and then 'insert gallery.'
Now your gallery is in your post. You can select the same alignment options for the gallery as for single images. You can add captions and a link in the gallery.

The Columns block: With the Columns block, selecting the option creates two columns. You can start typing in the first column, use the plus icon to add a different block type.
To choose the number of columns, you must select the block. It will show you the Block Settings. When you set up the Columns, they are evenly divided across the space available. Then you can click on the desired column to add an image block in each.
Aligning Side-by-Side Images in the center
If one embeds the images in a row, they align to the left corner of the content area by default. If you wish to put them in the center, then put the cursor on the line where you want the images to be. Now click text-align: center icon.
The cursor then shifts to the middle of the line; then one can go to Add Media. When one embeds the images, they come to the center. Note that one has still go to select align: none for the images themselves.
3- Putting text over an image
You can use the cover block for this. This block enables one to place text over an image. Once you edit your image, you can select the wide or full-width option and add the text over it.
It will show the dark overlay so that you can write a caption over the image. It is an excellent addition to the post creation process.
4- Embedding Images from your social media
There are Image embed blocks that enable you to add the content from your social media websites into your posts. Currently, you can do this with Instagram and Flickr.
To do this for Instagram, take your Instagram URL and paste it on the desired place in your post. The image appears in the post with likes, comments, and Instagram border.
Drawbacks in the new editor
A considerable problem with Gutenberg is that you can't do content escaping if you want a small piece of text next to the image, and the next piece of text below the image. Pressing enter a few times creates spaces in the post, but when you publish the post, the empty spaces get ignored.
Conclusion
The essentials to align images in WordPress block editor include the basic alignment and editing options. Gutenberg offers a wide width and full-width options as well. If you wish to add multiple images in one line, there are two ways to go about it; the Columns block and the Gallery block.
You can add text over an image using the cover block, and the Image embed block allows you to add images from your social media accounts. WordPress Tech SEO simply refers to “things” that are related to code, settings, and servers.
But one problem with Gutenberg is that you cannot add text below an image, and the 'Enter' key doesn't seem to help much. You can use the spacer plugin, but it doesn't work for mobile devices.


