Are you finding it difficult to create a redirect in your WordPress website? Or are you not able to understand its fundamental concept and importance?
This is a small read or a beginner’s guide to WordPress that covers everything that you should know about redirects. What is it all about? How to create it? And why and when should it be used? The answer to all these questions can be found here.
Understanding Redirects for a WordPress website
You have to inform the audience to visit your new page because you have migrated from your previous domain. This is done by sending a message on the users’ browser when trying to access the older URL. The entire process of doing this efficiently is called redirecting.
There are several kinds of redirects like 301, 302, 307, and others. The most used and important amongst it is 301. Therefore, in this article, we will learn methods of creating 301 redirects. But first, it is important to understand its significance.
Importance of 301 Redirects
The primary importance for it is to inform your audience that you have migrated from the existing domain name or page. At the same time, it also enables them to automatically visit the new address.
Users are often confused when it comes to redirecting their audience from old posts to new posts. In such cases, this redirect will come to your rescue.
Redirects are created when the admin is deleting a page or post for better-upgraded content. They are also used when significant changes are made to the permalinks of your page or post. But why is exactly is it needed?
It is required because when you are creating 301 redirects you ensure that the audience will not see a '404 not found' error. Such errors are retarding the brand value of your organization and at the same time impact your SEO.
They are also one of the core reasons for the drop in search engine rankings. This makes creating it important.
Using it allows you to divert all the traffic from your old page to the new page which indirectly strengthens the SEO.
Creating 301 Redirects with Plugins
One of the most convenient methods to manage and create 301 redirects is through a plugin. Just like other functionalities and tasks, this can also be efficiently carried out with the help of a plugin.
The best advantage is that you do not have to write a single line of code and your task is done.
Redirection

Using the Redirection plugin is one of the simplest ways to manage and add redirects in WordPress. It is open-source software and is widely used around the globe by millions of users.
Download, install, and activate the plugin first and then navigate to the Redirection option from the Tools menu. Now you will be able to set up your operation.
The unique fact about this tool is that it helps you in detecting 404 errors on your WordPress website. This will help you in redirecting them to an appropriate URL destination.
Page Link to

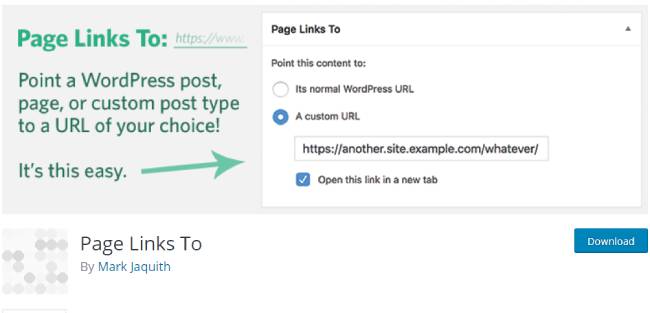
Despite having an active page sometimes you want users to be redirected to another page or post. Page Link To is a tool that will come handy in such situations.
On your post edit screen, this tool will add a meta box where you can enter the address. Enter the correct address where you want your audience to be redirected to it.
Simple 301 Redirects
This is another simple and easy to use plugin, for redirection purposes. Primarily download, install, and activate the plugin so that you can find the 301 Redirects option in the Settings Menu.
This will help you in adding the necessary URL and other details. The setting up process has a simple user interface and does not take a long time.
You must note that depending upon your WordPress hosting provider the redirect may be slower by some microseconds.
For faster redirections, the code method and .htaccess file can be used.
Creating 301 Redirects with .htaccess
With the help of server configurations like .htaccess faster redirects can be created. You must have a fact in mind that even a small mistake in the code can make your site inaccessible.
You will start witnessing internal server errors due to that. Therefore it is recommended to follow the steps with accuracy and have a backup before you start this process.
It will be necessary to connect your website using an FTP client to edit the .htaccess file. The file can be easily found on the website’s root directory. In case you fail to find the files there then force your FTP client to show hidden files.
It can be easily modified in notepad or any other plain text editor. The following is a simple example of a redirect from an old post to a new one.
RewriteEngine On
Redirect 301 /from-an-old-post/ http://sitenameabc.com/the-necessasry-post/
The code can be easily added at the end of the file. Save the changes and you are done.
Conclusion
We are hopeful that this read helped you in understanding and setting up redirects for your site.


