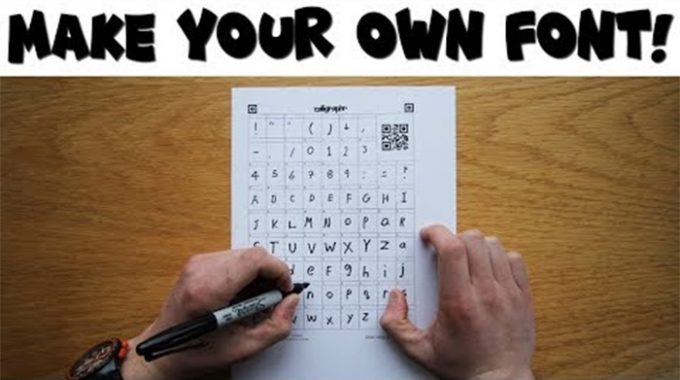
You have countless options for choosing the right font for your specific project, with packages such as TypeKit and Google Fonts.
Such packages collectively offer thousands of different fonts to meet your requirements.
But, the one limitation that you are going to face will be selecting an option that was created by someone else.
If you have the motivation to make your own font then there are several options for doing the same.
In this article, we have formulated a step-by-step brief guide with intermediate-level software to help you in creating custom fonts.
You will also find suggestions for advanced alternatives and other less technical options. But before starting it is necessary to figure out why is it essential to create custom fonts.
Importance of creating custom fonts
The process of creating fonts is time-consuming, technical, and sometimes expensive as well.
Hence, before diving into the process it is better to understand how deep you intend to dive.
The desired usage of your custom creation will help you determine the time and investment that is worth in this development.
If it is just for learning and fun then basic tools are something that will suffice your requirements.
But if it is for an important project or launch then you must learn the vitals techniques and use sophisticated software. This read includes all these routes for a clear understanding.
In case if you are creating it for professional use by others then we recommend you invest sufficient time in learning.
The more you learn and spend on the development software the more attractive results you will generate.
Basic Tools
If you simply want to explore and have fun with this process then here are some basic tools to explore. It will help in learning the basic technicalities of font creation.
PaintFont – By Scanning and filling out a template this free tool enables you to convert your handwriting into a font.FontStruct – This free tool helps you with customized creations using geometrical shapes.
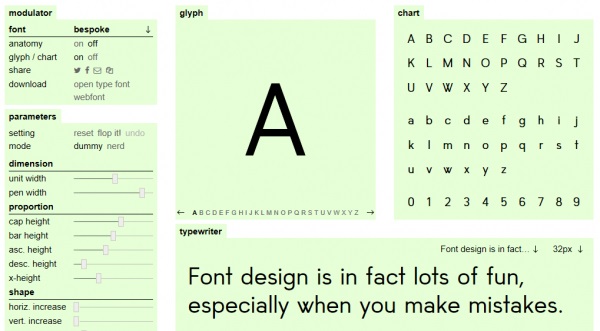
In addition to these tools, there are certain other premium tools that you can use for this process.
So these are the simple options for customized font formulations and now let’s explore the technical methods.
Six Simple Steps to Make Your Own Font
If you are firm about creating a customized font with peculiar personalization then there are several free tools to choose from.
But, before we get our hands on that software it is mandatory to learn a few steps. In the following segment, you can explore and learn them.
Step 1 – Create a brief outlook of the Design
In the entire creation journey, this step is the most crucial. Just like any other project here also it becomes essential to create an outlook of your objectives.
When creating your own design, ask yourself the following questions.
- Is the application of your font project-specific or broad?
- What will be the size of your fonts (large/small) if you are aiming for a particular application?
- What kind of basic type do you want it to be from Sans Serif and Serif?
- Are there any specific options that you can refer to for inspiration?
Only after you have the answers to these questions you can move on to the next stage of planning.
Step 2 – Craft your imagination on paper
Kick-starting the process with design software seems fascinating. But, we recommend that your early and initial design should start from a paper.
It could potentially be time-consuming and misleading when you try to create your shapes directly on a computer. With pen and paper, you can conveniently carve out your imagination quickly with a clear outline.
You can rely on the following tips to make your own font set with pen and paper
- Start with control characters like ‘H’, ‘n’, ‘o’, and ‘y’. Creating a full character set straight away is not required.
- To use as a guide mark out the important height lines and the baseline.
- Analyze and learn from other font-sets and spot the repeated characters in that set.
- For creating smooth curves try moving the page instead of your hand.
You can also explore other professional and free tutorials for learning more about crafting such designs on paper.
Step – 3 – Select suitable software and install it
A wide range of free applications is available for intermediate designs in typography.
But, it is essential to select the one that can be used by you comfortably and also has all the required functionality.
Here are some of the frequently opted and most recommended ones that you can use to make your own font.
FontForge
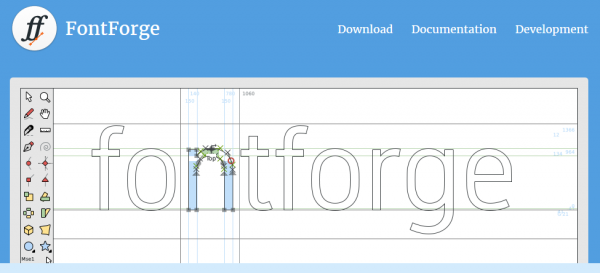
This is a one of its kind font editor in the open-source domain. It includes comprehensive documentation that helps in guiding you through the design process.
The interface can be a little subtle in the initial stages, but it is easy to get used to it. You can create amazing designs by starting from scratch or uploading images as a starting point.
Birdfont
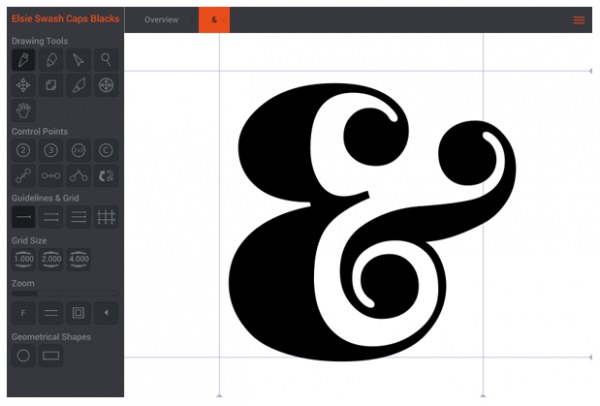
Under the SIL Open Fonts License, it is free to create fonts here. If you are looking to start quickly then this is a slightly more intuitive program.
In FontForge you can use your image as a reference point or start from scratch, but here there are tutorials.
Despite this, it cannot beat the supporting information and details provided in FontForge.Also, note that if you are creating fonts for commercial use then it requires a donation of a minimum of $5.
Glyphr Studio
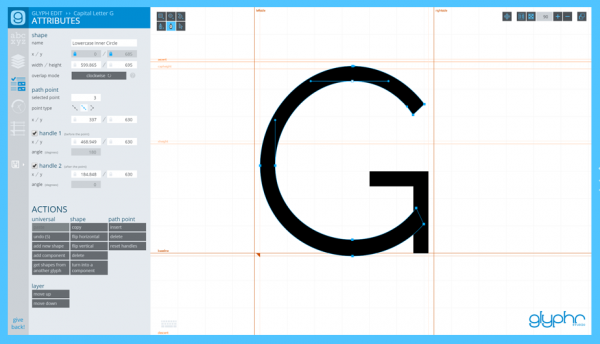
This is a strictly web-only tool and does not exist in a desktop-based version.
When it comes to ease of use this option falls in-between the other programs offered in this list.
The design interface is pleasing compared to other alternatives and yet it is slightly more intuitive.
You also receive sufficient documentation along with it, but yet it is not comprehensive. Uploading images or font files is also not possible here.
All the above-mentioned tools have almost similar offerings, but in the end, it comes to a matter of preference.
We recommend you try your hands at all three and select the best to make your own font.
Step 4 – Kick-start the development process
You are ready to make your own font once you have finalized a program. Depending upon your selection you can start the development process with the basic steps in the program.
You can expand to include characters, letters, and numerals once you have your control characters translated.
The learning curve will vary from one software to another which makes this process quite lengthy.
But things will start to speed up once you get used to the basics of operations and control. Following are some common terminology that will help you attain the speed at the start.
- Glyph – A glyph is considered to be each individual character in a font
- Baseline – The font characters sits on an invisible line which is known as baseline
- Ascend line – The invisible line at which the ascenders begin is the ascend line
- Ascender height – On letters like ‘h’ and ‘k’, the height of the upward vertical stroke is ascender height
- Descender depth – On letters like ‘p’ and ‘y’, the depth of the downward vertical stroke is descender depth
- Stem – On letters such as ‘F’ and ‘T’, the main vertical stroke is called Stem<
- Bowl – On letters such as ‘o’, ‘b’, and ‘d’, the closed rounded part is known as Bowl
- Bezier curve – For modeling smooth scalable curves this is a parametric formula
Remember this is not even the tip of the iceberg. There is a lot for you to learn, adapt, and understand in this process.
Step 5 – Polishing the set of characters
During the creation process, the prime focus is on the individual characters.
But, when you polish the character sets it helps you in understanding how they will look as a whole.
To keep you on track while you make your own font and polish them here are a few tips.
- By combining a series of letters in the process pay attention to the kerning and spacing.
- The sizes of each character should be determined. This should be done inevitably if its application is broad.
- Throughout the entire design process ensure that you print the work regularly. Subtle mistakes can be easily spotted on print as compared to the screen.
Once you have done this, you are almost there. By this time you would have designed your font with a perfect grip on the chosen software.
The transformation of your imagination to a digital format would have also completed and you would have polished it to perfection.
So basically the make your own font process is complete and the only task remains is to upload it.
Read: Script and Handwritten Most Popular Typefaces Cursive Webfonts Names
Step 6 – Uploading your creation to WordPress
Once you have completed the entire development process, you would want to start using it immediately.
There are various upload methods if you intend to upload it on your own WordPress website. The simplest of all is to use a font plugin that will do the work for you.
Plugins like Use Any Font will enable you to convert your font file, extract the CSS code, and finally embed it to your theme file.
The file types supported by it are OTF, TTF, and WOFF. Once the upload is complete you can immediately use the fonts.
A single conversion is absolutely free with this plugin. If you donate $10 or more you can convert an unlimited number of files and use them on your website.
If you do not intend to use a plugin then the other method is to add your own CSS code.
To obtain the necessary code you will first need a code generator like Transfonter or Font Squirrel. The only process to do now is to add this code to the style.css file of the theme.
Using Advanced Tools
You can use advanced tools when you want to make your own font. But it should only be used when your creations can be used for a wider purpose or commercial applications.
There are hundreds of advanced tools available that are premium in nature and can be availed easily. You can also refer to suggestions from professional typographers before finalizing a program.
Expanding your knowledge with tons of resources that are available online is essential before you select a program.
This will help you in creating accurate fonts as per the demand, requirement, or imagination. Without adequate knowledge and learning, it is not advisable to turn to advanced or premium programs.
ConclusionIt is not unusual to feel that something is missing even if you have a multitude of options in fonts.
Creating your own by cracking out the stationery is a bold and feasible solution in such scenarios.
With necessary dedication and by following the steps mentioned-above accurately, you can create mesmerizing customized fonts.
Remember that all six steps are essential. Selecting programs and plugins should be truly your choice. If you find this read interesting and knowledgeable then share it with your colleagues and friends.


