Publishing WordPress testimonials from customers, readers, and happy clients for promoting your service or products is a great method to boost conversions. This can also be used when you want the audience to stay for a longer time or want them to read your blogs.
It helps in conveying to the potential audience and clients the benefits that they can expect from you. In addition to that, it also ensures confidence in them to trust your service and credibility.
When high-profile personalities endorse your products, provide reviews, and feedbacks the task of attracting visitors becomes easy. This can play a big role for everyday users who are today looking for social proof everywhere. This can help in molding their decision and converting them into clients from the audience.
Gathering feedback from satisfied customers and using other tactics is totally up to you. In this short read, we will learn about tools that make managing and publishing testimonials easy on your site.
Slider Plugins exclusively for WordPress Testimonials
There is always an option to directly add the feedback in the posts and page. But, just like everywhere else, presentation matters here also. Plugins can help you in presenting the testimonials in the best possible ways.
Thanks to the WordPress community and people involved in the same there are dozens of plugin for the same. But there are few issues in many of such programs that can make them unsuitable for your site.
However, only choose a testimonial plugin after reading all the reviews and ratings. Strong Testimonials is one such open-source software which is highly effective. It is incredibly easy to use and does most of the formatting for you. It automatically matches parameters like fonts and colors according to your theme.

There should be no limit to the number of reviews that you can add in a plugin. You can use a shortcode to publish it or though a plugin that presents them in a slideshow format. Plugins have the potential to introduce other attractive features as well.
Using WordPress Testimonials Plugin on your Website
The first parameter will be to install the plugin from the WordPress directory or an external source. For adding Strong Testimonials plugin check the following.
Login to the admin area of the website and navigate to Add New option from the Plugins menu. The sidebar menu will assist you in this task. Search for ‘Strong Testimonials’ in the Add Plugins screen and then from the results install the program. There are multiple programs online that are doing exactly the same task. Hence, be sure to pick the right one.
The settings can be easily accessed from the testimonials sidebar menu after it is installed and activated successfully.
Plugin Configuration
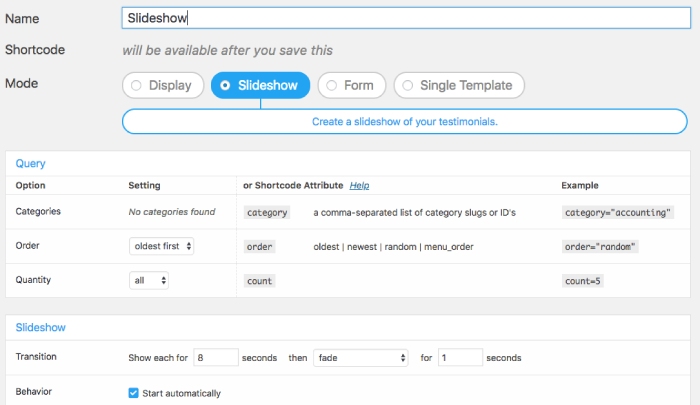
When you choose to use a plugin like the one that we used, it will be easy to start immediately. The numbers of options on the settings page are limited. But, they are enough to give you a solid control of how all the testimonials will be displayed on the website.

The two ways in which it can be displayed efficiently are as a list and slideshow. The customization is simple and easy to understand. For example parameters like the order of the slideshow and transition speed can be easily managed.
Check for other features and give it a try. Once you have everything in order then click the save option. At the top of the form just beneath the name, a shortcode will appear. You have to place that code on the post or page where the testimonials are to be displayed. However, it is necessary to add a few testimonials, before being able to change the settings. The tweaking should not be overdone.
Adding WordPress Testimonials
The first testimonial can be added once you are satisfied with the configuration of the settings. You have to click on the Add New button from the testimonial menu.

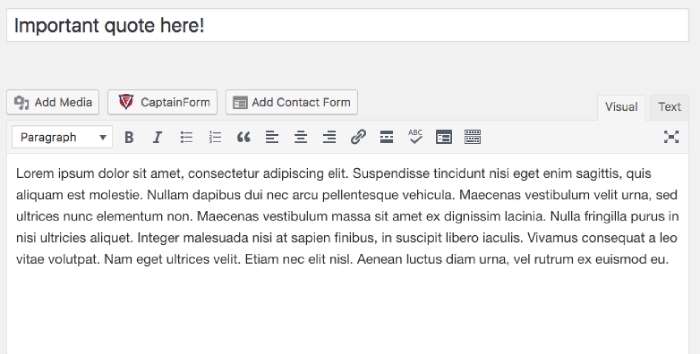
For the plugin that we have recommended it is mandatory to add some words about the quote. Those words will be highlighted in the title field. The full quote can be added in the body section which falls below it.

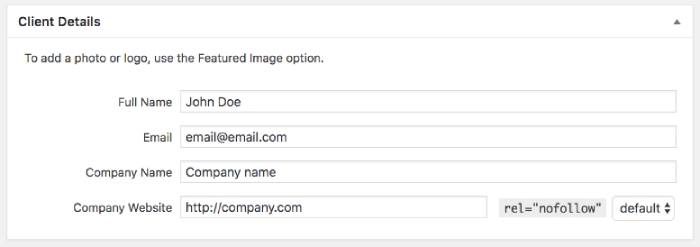
There is a featured image field that enables you to add a photograph or another image. Along with the feedback this image will also be displayed. The name and designation of the individual providing the feedback are also recorded. It is displayed below the post and if required we can add a link to the company website or social media handle. Save it once you are done and then hit the publish button.
The Final Step – Publishing
The testimonial will be shown exactly at the place where you put the shortcode that is generated during the configuration process. If your plugin permits you can manage to choose different displays in different places.
The ideal practice is to use the slideshow format on the homepage. This enables you to save considerable space and the visitors can also easily scroll through them. In the later stage, you can decide to create a dedicated page and a grid layout. Add all the feedback into the same for a mesmerizing effect.


