
Google Analytics is a standard when it comes to web analytics tools. Learning how to add Google analytic is a vital part of running your own website.
But there are many users that struggle when it comes to add Google analytics to WordPress and tracking the site.
This software can give you important data about what is and isn't working with your site and gives you a chance to make decisions about its future.
In this article we are going to answer several questions about Google analytics, let’s get started. In last article we learn how to add Google Analytics to AMP Pages on WordPress. In this article we learn How to Add Google Analytics to WordPress?
What is Google Analytics and Why do you need it?
Before getting into the technical, let’s first know about Google analytics. If you are new to WordPress then you might not know about what it is and why it a great idea to connect it to your website.
-
Google Analytics helps you to know your audience
It helps you to analyse your internet traffic. After you start your blog, your goal is to get more traffic and subscribers. It also helps to make your data driven decisions by showing you the statistics that matter like:
Who visits your site? It provides you with the geographical and the technical information about where your customers are from and what device they utilized to access your site.
What do your visitors do when they are on your site? You can track where the users are going on your site, the bounce rate and how long they stay on your website and more.
When are your visitors coming from? It shows you when do people visit to your site by the hour, day, week or month.
How do people find your site? You will also get to know about whether your visitors find your website in search engines, social media, links or from other site’s or if they directly enter your site’s address.
How do visitors interact with your content? From Google analytics you will understand how people interact with your website like, the links they click on and much more.
-
Use the information to optimize your website
Knowing the above points allows you to do many useful things.
- You can adjust your website to serve your audience better, by improving technical aspect or adding a language.
- Optimize your site’s traffic sources, invest more that work well or increase your efforts on those that don’t.
- Track marketing campaigns and see if they are working.
- Track your worst performing pages and takes steps to make them better.
Basically,Google analytics enable you to remove of guesswork and make choices about your webpage depends on facts and hard information instead of gut feeling.
Google Analytics is totally free to utilize, so it doesn't add to site costs.
Step 1. Sign Up with Google Analytics
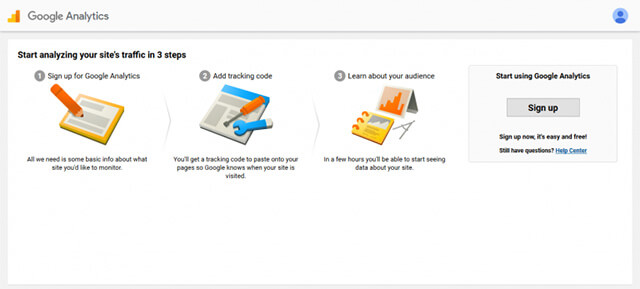
Head over to the Google analytics page and sign up. If you already have an account, then simply login. If not, then click sign up to get started.
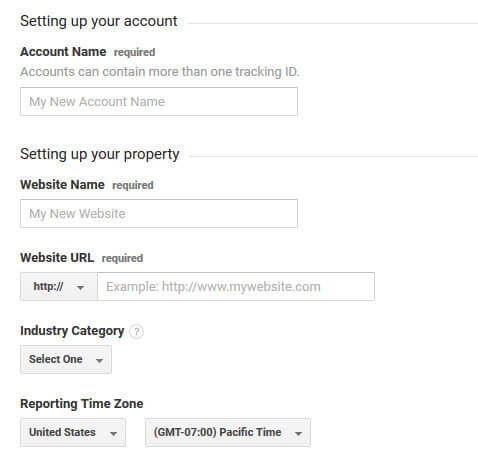
On the next screen you will be given a choice mobile app or website, ensure that you select a website. After that, fill all your details. After this get tracking ID to continue. In the next step we will the tracking code to your website.
Step 2. Learn the basics of Google Analytics
Before we get to how to add the code to your site, how about we have a quick look around the main Google Analytics interface.
This way, you get a better understanding of the sort of data you can discover there. You can get there by tapping the Home button.
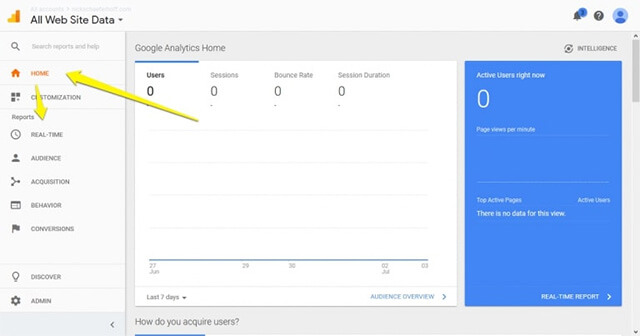
At right, you will see the statistics, while on the left you can see the data to look at. You can see a number of different sections that if clicked on, contain sub menus and also contain the following information:
- Realtime- Gives you what is going on at the movement on your site. How many users are on it, where they are from, what they are looking at and more.
- Audience- Contains data that help you study more about your client’s example, the quantity of guests in a period of time, how long they stayed on average and the demographics as well as the technical data about them.
- Acquisition- Gives you which information about which sources send clients to your website and the information about your marketing channel.
- Behavior- All the data what your visitors do after coming to your site, the content they look at and more.
- Conversion- In the event that you have defined your goals inside Google Analytics, here's the place you understand how well you are getting along in accomplishing them.
Step 3. Adding Google Analytics to your WordPress site
In order to add Google analytics to WordPress for tracking your visitors, the code above needs to be present on every page of your site you want to do that on. Here is how you can do it manually.
Option A: Insert the code into header.php
The main way of adding the code to your website is to insert it into your header. This way, it will load on every page. Because of how WordPress is set up, it is very easy to achieve.
Most themes have a header.php file that is responsible for displaying the site’s header section. So, you can simply add Google Analytics code here.
But it is always better to do it in child theme or they will get lost when you update the theme. Once you have created your child theme, just copy the header.php from the main theme into it and start editing it. Copy and paste the Google Analytics code just before closing </head> bracket.
<?php
/**
* the header for our theme
*
* This is the template that displays all of the <head> section and everything up until <div>
*
* @link https://developer.wordpress.org/themes/basics/template-files/#template-partials
*
* @package WordPress
* @subpackage Twenty_Seventeen
* @since 1.0
* @version 1.0
*/
?>
<!DOCTYPE html>
<html <?php language_attributes(); ?> class="no-js no-svg">
<head>
<meta charset="<?php bloginfo('charset'); ?>">
<meta name="viewport" content="width=device-width, initial-scale=1">
<link rel="profile" href="http://gmpg.org/xfn/11">
<?php wp_head(); ?>
<!-- Global site tag (gtag.js) - Google Analytics -->
<script async scr="https://www.goglemanager.com/gtag/js?id-UA-121810901-1"></script>
<script>
window.dataLayer = window.dataLayer || [];
function gtag(){dataLayer.push(arguments);}
gtag('js', new Date());
gtag('config', 'UA-121810903-1');
</script>
</head>
Also, ensure the code you paste is wrapped in <scripts> brackets. Now save and upload the file to server.
Option B: Use functions.php
Another way to add Google analytics to WordPress without a plugin is to utilize the functions file. You can do the similar thing as we did above.
Insert the tracking code into the head section via a function, rather by adding the code to header.php.
For doing it, just edit your child theme functions.php file and add the following piece of code.
function ns_google_analytics() { ?>
<script async src="https://www.googletagmanager.com/gtag/js?id=UA-121810903-1"></script>
<script>
window.dataLayer = window.dataLayer || [];
function gtag(){dataLayer.push(arguments);}
gtag('js', new Date());
gtag('config', 'UA-121810903-1');
</script>
<?php
}
add_action( 'wp_head', 'ns_google_analytics', 10 );
Save, upload and Google analytics will start tracking your site.
Option C: Use a Custom Plugin
To add Google analytics to WordPress the third way is to manually add code to your site is creating your own custom plugin.
This also enables you to switch tracking on and off from the WordPress backend. But, ensure that the tracking code stays on your website even if you change themes.
On the off chance that you have never made a plugin, don't stress, it's very simple! Before we do the below work, your active theme needs the wp_head hook inside header.php. That is generally implemented by default,but it is worth checking.
<?php
/*
Plugin Name: Custom Google Analytics Plugin
Plugin URI: http://creativedesignblog.com
Description: Add the Google Analytics tracking code your site header.
Author: john
Version: 1.0
*/
function ns_google_analytics() { ?>
<script async src="https://www.googletagmanager.com/gtag/js?id=UA-121810903-1"></script>
<script>
window.dataLayer = window.dataLayer || [];
function gtag(){dataLayer.push(arguments);}
gtag('js', new Date());
gtag('config', 'UA-121810903-1');
</script>
<?php
}
add_action( 'wp_head', 'ns_google_analytics', 10 );
Make sure to replace the tracking code between the <scripts> with your own. Or else, it will not work. Once you done saving the file and upload it to your website’s plugin folder (wp-content > plugins).
You can also give it its own sub-folder if you want to. After you are done, activate it from the back end of the WordPress like another plugin. The easiest way is to utilize one of the many plugins available.
How to Install Google Analytics with a WordPress Plugin
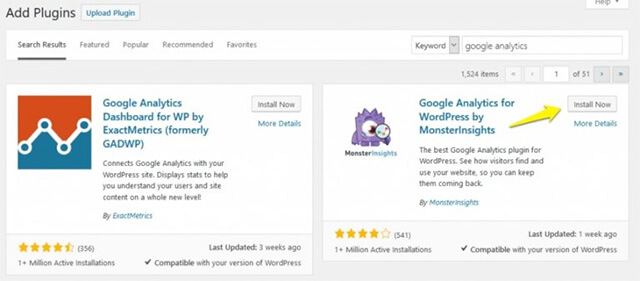
In this article, we will utilize Google Analytics for WordPress by MonsterInsights. It is the most famous plugin in the directory for this purpose with the installs of more than two million.
It's likewise actually simple to utilize and comes with a plugin that helps make it GDPR consistent (only in the premium version). Let’s get started.
-
Install the plugin
Whenever you want to use a plugin on your WordPress website, the first step is to
Normally, at whatever point you need to utilize a plugin on your WordPress website, the initial step is to install it. For that, basically go to Plugins > Add New. Search for it by name.
When you find it on the list, click install now to start downloading it to your WordPress site. Activate it when it’s done.
-
Connect to Google analytics

When the plugin is active, you will see a new menu item Insight in your website’s dashboard. Then go to the settings menu.
Click on authenticate with your Google account. This will take you to the Google analytics page. Then sign in, or if you already are signed in, then chose the account you want to use for tracking.
After logging in, it will ask you to give permission for the WordPress plugin to access your data. Again, you will be asked to select the profile to track, then select the one you created earlier.
a) Another method
This is not the only way to add Google analytics to WordPress website with this plugin. You can add tracking code manually, for that, click on ‘click here to authenticate manually’. You will see your UA code as the tracking ID in your account.
Then copy and paste it in the plugin settings, then save.
-
Adjust tacking settings
![]()
Once it is connected you can click on the tracking tab for making the changes in how the app tracks your website visitors.
Let’s understand the important quickly:
- Engagement-This option to let you ignore site users by user role and enable event tracking.
- Demographics- Switch on demographics and interest reports.
- Permissions- Allows you control who on your site can see the reports and change settings, regardless of whether you need the plugin to updateautomatically, track usagestatistics and show announcements.
There are a couple of more minor things you can change the example, taking care of affiliate links and more.
-
Checks the reports
The cool thing about MonsterInsights isn't just that it's easy, but also that it pulls Google Analytics information specifically into the WordPress dashboard. You can see it under Insights > Reports.
Know, that it takes some time for Google to show any information. thus, this part may be empty right now, simply like in your Google Analytics account.
Mostly, it takes 12-24 hours before the information begins showing up, simply check back later.
At this point, you are prepared to add Google analytics to WordPress site. We hope it will enable you to make your site much more successful.